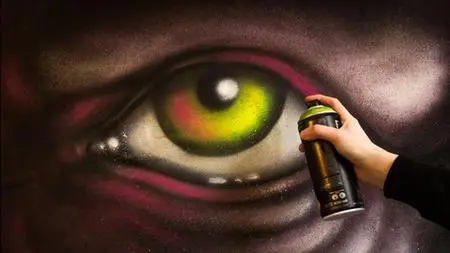
How To Spray Paint Eyes
Published 2/2023
MP4 | Video: h264, 1280x720 | Audio: AAC, 44.1 KHz
Language: English | Size: 720.91 MB | Duration: 0h 33m
Published 2/2023
MP4 | Video: h264, 1280x720 | Audio: AAC, 44.1 KHz
Language: English | Size: 720.91 MB | Duration: 0h 33m
Tips + Tricks for Painting Street Art and Graffiti Character Eyes
What you'll learn
To understand materials including opaque and translucent spray paints and caps used in the video
The ability to layer colors to create depth and the illusion of reflected light
To apply shading techniques to create soft transitions between light and shadow areas/darker and lighter colors
To create an eye painting from start to finish with a limited color palette (5 cans of paint)
Requirements
Basic knowledge is helpful but not a requirement. In order to practice the techniques explained in the videos, 5 cans of paint and a surface to paint on are good idea to get the most out of the course.
Description
Want to learn how to spray paint eyes for your street art and graffiti characters? If you've answered "yes", then you've come to the right place :)!Throughout the lessons, I'll talk you through a painting step by step and we'll explore the materials, techniques, and specifics about how to go about painting your own eyes.Painting well takes practice and the purpose of the course is to provide you with the tools to get you started on your eye-painting journey. Don't worry about the end result, the goal is to solidify the concepts and gradually build your can-control until you get the desired effects. The most important thing is, to have fun with it and enjoy the process!Here's a break-down of the course contents:MATERIALS: All of the colors and caps listed for your convenience, introduction to translucent paints, type of mask used for paintingCAPS DEMO: Painting demo with the caps used throughout the lessons, painting tips, and practiceOUTLINE + BASE: THE "WHITE" OF THE EYE: Initial outline, using reference materialPAINTING THE IRIS: Picking a light source, layering paint to create depth, painting instructionDETAILS IN AND AROUND THE EYE: Painting convincing folds and shading techniquesADDING AN AMBIENT LIGHT SOURCE + FINAL DETAILS: Introducing a secondary light source and adding final details.PRACTICE PROJECTS: Simplifying the painting process, and applying the learned techniques with a limited color palette.PRACTICE PROJECTS:Now it's your turn, my painty friends!Practice Project #1: Focus on Painting Just the IrisUse the techniques of layering your paints from darkest to light to create the illusion of light reflecting on the iris. Imagine the shape of the eyelids, and create shading with the translucent black.Practice Project #2: Paint an Eye with just 5 Cans of PaintPrime a canvas or wall with white paint. Use just 5 cans of paint to build shapes and shadows. You will need:1 can of black spray paint1 can of white spray paint1 can of mid-value spray paint for your skin tone1 can of darker color spray paint of your choosing and1 can of a lighter shade in the same range (i.e. dark green + light green) for the irisShare your ProjectMake sure to share your paintings by uploading pictures in the assignment submissions area when you answer test questions. I'm super excited to see what you paint and am happy to answer any questions you might have along the way!
Overview
Section 1: Introduction
Lecture 1 Introduction
Section 2: Materials
Lecture 2 Materials
Section 3: Caps Demo
Lecture 3 Caps Demo
Section 4: Outline and Base: the "White" of the Eye
Lecture 4 Outline and Base: the "White" of the Eye
Section 5: Painting the Iris
Lecture 5 Painting the Iris
Section 6: Details in and Around the Eye
Lecture 6 Details in and Around the Eye
Section 7: Adding an Ambient Light Source and Final Details
Lecture 7 Adding an Ambient Light Source and Final Details
Section 8: Practice Projects
Lecture 8 Practice Projects
Section 9: Conclusion
Lecture 9 Conclusion
This course is for anyone wanting to improve upon their spray painting skills.


