

Civil3D Classic Course
Civil3D Classic Course
Published 3/2025
MP4 | Video: h264, 1920x1080 | Audio: AAC, 44.1 KHz
Language: English | Size: 13.02 GB | Duration: 15h 43m
Published 3/2025
MP4 | Video: h264, 1920x1080 | Audio: AAC, 44.1 KHz
Language: English | Size: 13.02 GB | Duration: 15h 43m
A step-by-step course for getting started with Civil3D and creating infrastructure models from scratch and all in 3D!
What you'll learn
Ribbons, Tabs, Toolbars, Selection, Pan, Orbit, Viewports, Layers, User Coordinate System (UCS)
2D & 3D CAD Tools, 3D Solid Modeling, 3D Boolean Operations, 3D Viewports
Creating & Editing Points, Surfaces, Grading, 3D Feature Lines, Surface Visual Analysis
Linear Alignments, Longitudinal Profiles, Custom Subassemblies, , Corridors
3D Visualization and Driving Simulation, Tool Pallets
Sample Lines, Section Views, Quantity Takeoff & Materials List
Requirements
A basic understanding of AutoCAD systems and Civil3D would make your learning experience smoother and easier, however, you may start from scratch as well by just following the step by step videos!
Description
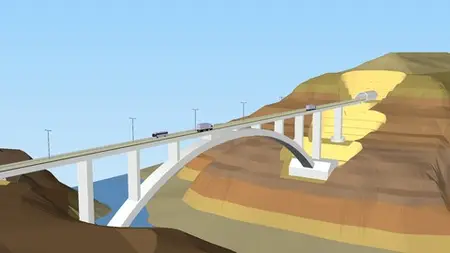
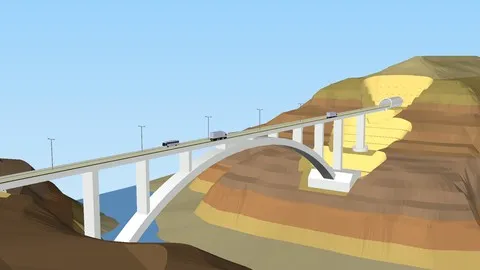
This is a step-by-step course intended for students and individuals following careers in surveying, civil engineering, road and highway design, 3D modelling and 3D reconstruction of infrastructure projects, BIM, etc.It was built in Civil3D 2024 meaning that project source files can be opened with C3D 2025 and newer but not by older versions than 2024 (you may build this project in older versions without the help of project source files by just watching videos)!It starts with fundamental and principals of 2D and 3D AutoCAD commands and operations from which it smoothly transitions to basic and Intermediate Civil3D native tools and functions.Throughout the course, many important areas of Civil3D software such as 3D modelling, point, surface, grading, alignment, corridor, assembly, subassembly, sample Lines, section Views, quantity Takeoff, materials List and profile are introduced to the learners sequentially with hands on creating real world project components (road, tunnel and bridge) other than working on impractical examples just for the purpose of learning Civil3D tools!This course provides a long range of professional 3D visualization techniques right from the beginning and it helps you learn solid skills which are rarely taught elsewhere as a package.The course includes a complete Civil3D project (along with supporting source files) which is built entirely from scratch using 2D linear features such as lines, polylines, arcs, primitive shapes and splines.So whether you are a beginner or not, this course will help you learn solid and professional skills in utilizing real-world methods in Civil3D program environment. Moreover, it provides valuable tips and tricks practiced in civil and infrastructure projects internationally for over a decade by the creator!
Overview
Section 1: Introduction
Lecture 1 Introduction
Lecture 2 Course Structure
Section 2: General UI & Workspaces in Civil3D
Lecture 3 Workspaces & Windows
Lecture 4 2D/3D Navigation & Visual Styles in Civil3D
Section 3: 3D Modeling the Arch Bridge
Lecture 5 Preparation of the 2D Sketch
Lecture 6 3D Solid Modelling (Arch & Foundations)
Lecture 7 3D Solid Modelling (Columns)
Lecture 8 3D Solid Modelling (Finishing Up the Columns)
Lecture 9 3D Solid Modelling (Bored Piles)
Lecture 10 3D Solid Modelling (Finishing Up the Big Bored Pile)
Lecture 11 3D Solid Modelling (Abutments)
Lecture 12 3D Solid Modelling (Bridge Bearings)
Lecture 13 3D Solid Modelling (Deck)
Section 4: Creating Points, Surface & Gradings
Lecture 14 Some General Information about the Section
Lecture 15 Point Creation Tools
Lecture 16 Creating a Surface with ACAD Contours
Lecture 17 Editing Surface Style & Properties
Lecture 18 Editing Surface Style & Properties (Elevation Analysis)
Lecture 19 Editing Surface Style & Properties (Slopes & Watersheds Analysis)
Lecture 20 A Brief Introduction to Grading Creation Tools
Lecture 21 Getting Started with Grading Creation Tools (Part 1)
Lecture 22 Grading Creation Tools (Part 2: Right Foundation Lower Grading)
Lecture 23 Grading Creation Tools (Part 3: Right Foundation Upper Grading)
Lecture 24 Grading Creation Tools (Part 4: Right Foundation Upper Grading)
Lecture 25 Grading Creation Tools (Part 5: Right Foundation Upper Grading)
Lecture 26 Grading Creation Tools (Part 6: Right Abutment Grading)
Lecture 27 Grading Creation Tools (Part 8: Tunnel Portal)
Lecture 28 Grading Creation Tools (Part 9: Tunnel Portal)
Lecture 29 Grading Creation Tools (Part 10: Right Abutment Back-Filling)
Lecture 30 Grading Creation Tools (Part 11: Right Abutment Back-Filling)
Lecture 31 Grading Creation Tools (Part 12: Tunnel Portal Back-Filling)
Lecture 32 Grading Creation Tools (Part 13: Subtracting the Tunnel Shape)
Lecture 33 Grading Creation Tools (Part 14: Subtracting the Tunnel Shape)
Lecture 34 Grading Creation Tools (Part 15: Fixing the Portal TIN Surface)
Lecture 35 Grading Creation Tools (Part 16)
Lecture 36 Grading Creation Tools (Part 17: Left Foundation Grading)
Lecture 37 Grading Creation Tools (Part 18: Left Foundation Grading)
Lecture 38 Grading Creation Tools (Part 19: Left Foundation Grading)
Lecture 39 Grading Creation Tools (Part 20: Left Abutment Grading)
Lecture 40 Grading Creation Tools (Part 21: Left Abutment Back-Filling)
Lecture 41 A Brief Explanation about Creating the Massive Grading Based on an Alignment
Lecture 42 Drawing a Basic Alignment
Lecture 43 Creating 3D Points from an Alignment
Lecture 44 Creating a Temporary Corridor for the Road with ACAD Tools
Lecture 45 Preparing a Bed/Base for the Left Road Grading
Lecture 46 Creating the Left Road Grading with its Detached Surface
Lecture 47 Finishing Up the Left Road Grading
Lecture 48 Adjusting the Left Road Grading TIN Surface
Section 5: Creating Longitudinal Profiles, Subassemblies, Corridors & 3D Visualization
Lecture 49 Creating a Longitudinal Profile
Lecture 50 Changing Visual Style of the Longitudinal Profile
Lecture 51 Changing Band Styles of the Longitudinal Profile
Lecture 52 Drawing the Project Line on Longitudinal Profile
Lecture 53 Changing the Style of Project & Profile Lines - Subassembly Warm-Ups
Lecture 54 A Brief Explanation about Subassemblies in Civil3D
Lecture 55 How to Prepare 2D Coordinates for Creating Subassemblies
Lecture 56 Basics of Subassembly Composers for Creating the Bridge Deck (Part 1)
Lecture 57 Basics of Subassembly Composers for Creating the Bridge Deck (Part 2)
Lecture 58 Basics of Subassembly Composers for Creating the Bridge Deck (Part 3)
Lecture 59 Basics of Subassembly Composers for Creating the Bridge Deck (Part 4)
Lecture 60 Basics of Subassembly Composers for Creating the Bridge Deck (Part 5)
Lecture 61 Importing Created Subassemblies in Civil3D for Setting Up the Corridor
Lecture 62 Creating a Corridor with Multiple Regions
Lecture 63 Filling the Right Abutment Gap
Lecture 64 Filling the Left Abutment Gap
Lecture 65 Cutting the Tunnel Structure Diagonally at Portal
Lecture 66 Creating a Solid Bed for Tunnel Structure at Portal (Part 1)
Lecture 67 Creating a Solid Bed for Tunnel Structure at Portal (Part 2
Lecture 68 Creating a Solid Bed for Tunnel Structure at Portal (Part 3)
Lecture 69 Creating a Solid Bed for Tunnel Structure at Portal (Part 4)
Lecture 70 Tidying Up the Scene and Using Drive Tool
Lecture 71 Creating a Basic Lighting System
Section 6: Creating Sample Lines, Section Views, Quantity Takeoff & Materials List
Lecture 72 Intro
Lecture 73 EG Surface Preparation
Lecture 74 Intro to Tool Pallets & Creating a New Assembly with Offsets
Lecture 75 Modifying the New Road Median Subassembly
Lecture 76 Creating & Modifying the New Road Lane Subassembly
Lecture 77 Creating & Modifying the New Road Shoulder & Side Ditch Subassembly
Lecture 78 Creating & Modifying the New Road Daylight Subassembly
Lecture 79 Rebuilding the Road Corridor Region with the New Subassembly
Lecture 80 Editing & Creating a Surface from the New Road Corridor
Lecture 81 Exploring the Sample Line Tools & Creating Sample Lines from Corridor Stations
Lecture 82 Setting Up Surface Targets for Sample Lines & Creating Group Section Views
Lecture 83 Using Compute Materials Tool & Basic Visual Edits to Section Views
Lecture 84 Quantity Takeoff (Creating Volume Report Tabs & Editing Section Views in Group)
Lecture 85 Volume Report Tabs Explained in Simple Words!
Lecture 86 Extra Quantity Takeoff (Calculating Materials List Presented on Section Views)
Lecture 87 Projecting the 3D Corridor Components to Longitudinal Profile
Lecture 88 Projecting 2D & 3D Objects to Section Views
Lecture 89 Final Touches to the Existing Ground Surface
Lecture 90 Ending
Beginners to Intermediate